How To Prepare Art For Printing
Your art looks great on screen, follow this guide to make it look even better once printed!
File Types
We accept InDesign, Illustrator, Photoshop, PDF and EPS files. Be sure to include all fonts and image links used. Images such as JPG, TIF, PNG can be submitted as print files as long as they are 300 ppi or higher and include bleed. Word, Excel, and PowerPoint files are also accepted but are unreliable, so we require that you submit both the original document and a PDF. We can't accept Publisher files, but we can accept PDFs made from Publisher files. If you don't have a PDF converter (such as Adobe Acrobat) installed on your computer, you can use free software such as Cute PDF (http://www.cutepdf.com/) to create one. Mac users have PDF conversion software built into their operating system already. Just look for the PDF button in the bottom left hand corner after you hit Print. We always prefer that you send native files in addition to a PDF. Native files allow us to quickly and easily make edits to your file and prevent delays.

PDF Requirements
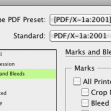
PDFs should be high res and include .125” bleeds, if applicable. The PDF/X-1a:2001 setting is a good preset - just make sure you turn on bleeds before you hit export! Keep in mind that using this preset means that the PDF will not be editable, so you should also include native files with fonts and links when you submit art.
Color Mode Settings
Document color mode and images should be set to CMYK. If you submit files in RGB, we will convert them to CMYK for you at no charge. However, this means the colors may not turn out as you expect. If you convert the files to CMYK yourself, you will have more control over the color and have a better idea of how they will print. Please keep in mind that all monitors display color differently. If you are concerned about color, we recommend that you see our Color Correct Proof after the PDF is approved - just ask!
Settings for a Black Background
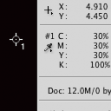
If you want to have a black background that is more saturated, you can use a rich black build. We recommend using a build of C:15 M:15 Y:15 K:100. Anything beyond this will not print well. Rich black builds are not recommended for text.
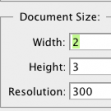
Image Resolution Settings
Images should be set to 300 ppi. Anything lower than that risks looking fuzzy or pixelated when printed. If the image includes text, going with a higher resolution such as 600 ppi will help the text print more clearly. However, if your file has type, we suggest that you place the image into an InDesign or Illustrator document and typeset there - this will be easily editable and produce crisp, clear text.
About Bleeds
Bleed refers to printing that goes beyond the edge of the sheet after trimming or into the bind. Often the paper is trimmed after printing to ensure that the ink runs fully to the edge and does not stop short of it.
Including Fonts & Links
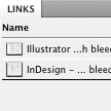
Please make sure that you include all fonts and links with your file! If you send native files without fonts and links, we will not be able to work with the file and your job may be delayed.
Gathering fonts and links in InDesign
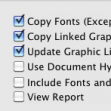
If you are using InDesign, you can easily gather all the items you need by using the Package feature. This feature will gather all fonts/links used in your document and copy them into a single folder. To use this feature, first save your document. Then go to File/Package. On the Create Package Folder screen, make sure you check the boxes that say Copy Fonts, Copy Linked Graphics, and Update Graphic Links in Package. Once that is done, compress the folder and send it our way!
Illustrator
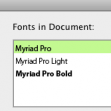
If you are using Illustrator CC, you can find a package feature under the file menu. If you are using an older version of Illustrator, you must gather fonts/links manually. Go to Type/Find Font to see a list of fonts you're using. Look at the links panel for a list of linked images.
Setting type to outlines
If you do not wish to send fonts, or you can't find them on your system, you may instead set the type to outlines. This may also be a good idea if you are very particular about your type/kerning. Type will not be editable once it has been converted to outlines, so it is a good idea to work from a backup file. To do this, open your document and use Save As… to save a copy of your file. Then, select the text box and go to Type/Create Outlines.
Setting Your Document or Artboard Size
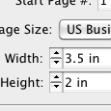
Set a document size that is the final size of the piece you are designing. For example, if you are creating a business card in InDesign, the page size should be set to 3.5" x 2". A letterhead would be 8.5" x 11". If you want the file to bleed, set the bleed to 0.125" (under "More Options" when creating a new document). If you are working in Illustrator, you would set the artboard to the final size.

InDesign vs Illustrator vs Photoshop
These are all great programs that have different purposes. Knowing when to use them can save you - and us - a lot of time and effort. In general, InDesign is a great program to use for anything that has multiple pages. This can mean newsletters or booklets, but it is also great for things like business cards and brochures. The Master pages feature in InDesign allows you to quickly apply changes to every page in the document without having to individually edit each page. Illustrator, in addition to creating logos and vector drawings, can also be used for layouts. If you are designing anything that has only one page or is only one-sided, Illustrator can be a good option. Photoshop is best used for continuous tone art, photos and photo editing. You may use it as layout software if that is all you have available, but it is not as flexible as other programs and files will not be as easy to edit later on. It is not advisable to use Photoshop for fine text or blocks of type or if you want to use Spot PMS Colors as opposed to CMYK.
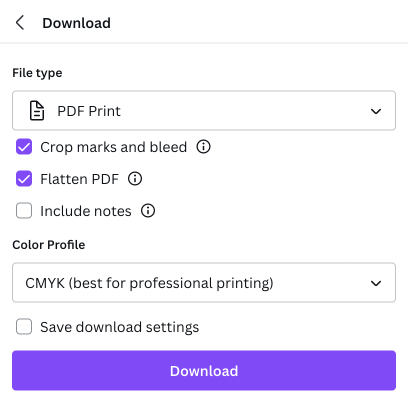
To send us files from Canva, download your file using the PDF Print setting. Check the boxes marked “Crop marks and bleed” and “Flatten PDF,” and choose CMYK for the color profile. RGB is OK if you don’t have a Pro account; just know that the color will look a little different once it’s converted to CMYK.
Native files refers to the program the files were originally created in.

About Saddle-Stitched Booklets
Saddle-stitched booklets must have a page count that is divisible by four, including covers. It can be four pages, eight pages, 12 pages, 16 pages... you get the idea. You must include .125” bleed on all 4 sides of each single page. When your booklet is ready for print, please submit native files. We often need to make small adjustments before we can go to print. If you submit a PDF, please send single pages, not printer spreads or reader spreads. We will set up the job so it folds properly.

Image Resolution & Bleed
Since large format prints are often seen from a distance, you can get away with using much lower resolution photos. You can use the expected viewing distance to determine what resolution photo to use. A general guideline is below. You are welcome to use higher or lower resolution files depending on your needs. We prefer .25” bleed for large format.
1ft-3ft: 200dpi
3-10ft: 150dpi
10-20ft: 100dpi
>20ft: 75dpi

General Information
For some good information and more things to consider when setting up files for large format printing, check out this article in Layers Magazine.

File Types
Large format prints also produce LARGE working files. Using the lowest needed resolution will help keep file size down, but often that will still produce 500mb+ files. Excessively large files can cause problems in production, so to save yourself (and us) and us the trouble by saving a copy of your working file as a high quality JPG. The JPG file size will be much more manageable, and as long as you are saving as a copy - not overwriting your working file - the quality will be fine. (If you are using vector files, these concerns don't apply to you. Vector graphics can be scaled to any size with no loss in quality, and their file sizes are much smaller).

Note about working with JPGs
If you are saving an image as a JPG, always make sure it is a copy of your original working file. Do not make any edits to the JPG copy. JPG files will compress and lose image quality each time they are saved, so if you make multiple edits to a JPG file and save multiple times, you will be losing image quality each time you save. If you have any changes, edit your original working files, and make another JPG copy when you are ready to send files to us. Always make sure that your working files are saved in PSD or TIFF format to retain quality.


